


Materials:
- 2 – 2×4’s @ 8′
- 1 2×6 @8′
- Kreg Drill
- Rust-Oleum Dark Walnut finish
- foam brush
- Ryobi Corner Cat Sander
- 2 1/2″ wood screws
- 2 1/2″ pocket hold screws
Directions:
- Cut 2 2×4’s @ 5ft. long
- Cut 4 2×6 @ 17″ long
- Use the Kreg Jig to drill 1 1/2″ pocket holes into the ends of each 2×6. (If you do not own a Kreg Jig, you can pre drill from the sides of the 2×4’s into the 2×6’s and follow up with 2 1/2″ wood screws.)
Like so: 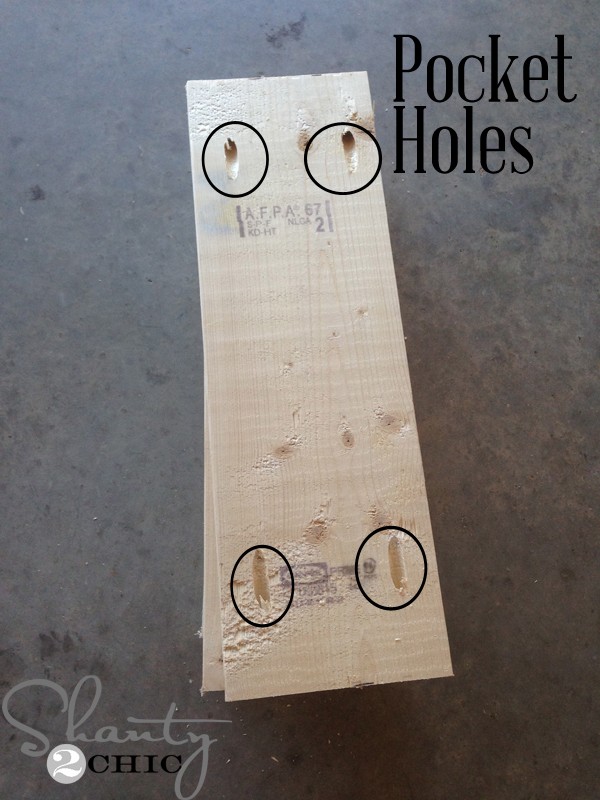
- Set the 2×6 boards so that the front corner touches the front of the 2×4 and the back corner of the 2×6 touches the back of the 2×4.
- Place the top 3″ from the top of the 2×4 and space the others 12″ apart from each other. Measured from the front corner of each 2×6.
- Making sure your Kreg pocket holes are facing the back, use 2 1/2″ pocket hole screws to attach the 2×6 boards.
- Next, just attach the other 2×4 to the other side of the 2×6’s the same way.
- To finish, apply one-coat of Rust-Oleum Dark Walnut with a foam brush. Wait about 5 minutes and then blend the stain with a clean cloth.
- To give it the worn look, you can use Ryobi Corner Cat Sander to distress the wood all over. This particular sander is perfect for sanding this piece because of all of the angles.
Now you can lean it against the wall and hand your blankets on it! Beautiful!
Do you have a simple DIY ladder to you have made or want to make? Share it with us!
Thank you so much to shanty2chic for this wonderful tutorial. You can see their site for more pics!
Pages: 1 2


Patrick Fase — need 3 please — !!!