


This is a wonderful project because if you already have your sander, you will probably only have to buy some polyurethane and MAYBE some twine. The main piece will be scavengered right in your own backyard.
According to sheknows.com, here is your tutorial to make this HANGING BRANCH CLOTHES RACK:
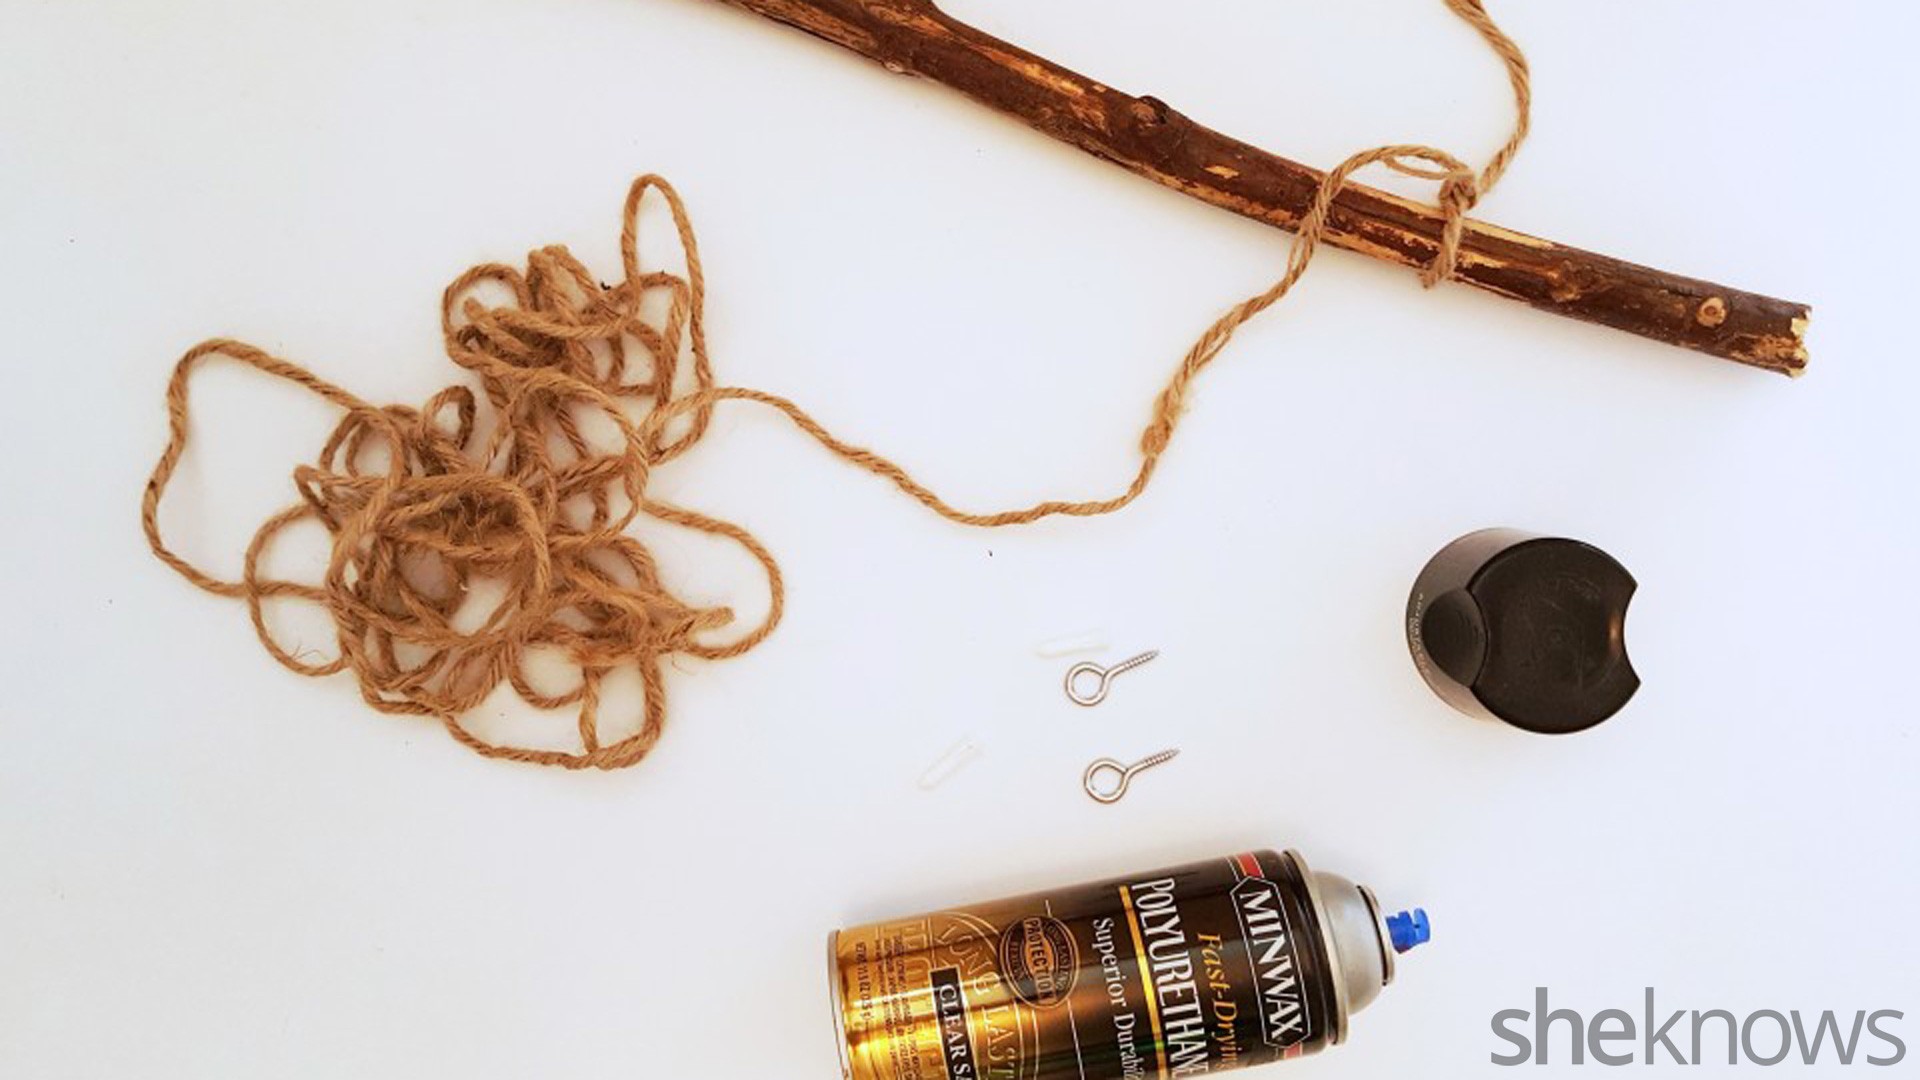
Materials:
Branch
Twine
Sander (an electric one)
Polyurethane
Hooks (get closed ones so there is no slippery sucker moments during installation)
Gloves (Optional, if you are afraid of splinters.)Instructions:
1. Prep the branch: clean it with water.
2. Sand the branch for a smooth finish.
3. Seal the branch using polyurethane paint or spray.
4. Cut two 6-inch pieces of twine (for ceilings that are 8 to 10 feet high) and tightly tie the strips on each end of the branch and you now have a rod.
5. Attach (with a knot) the other ends of the twine to the ceiling with hooks (ideally, closed-end hooks so the twine doesn’t slip out), and now you have a hanging rod.
The finished product is so adorable!

Why not make one in your room, too?
Have you ever DIYed with a simple branch? Please share with us what else you can make!
Thank you to she knows for this great DIY. See their site for lots more great pics and deets about this project.


I don’t know what kind of branch it was but I peeled off the outer layer and I didn’t even need to sand it down. I use it as a walking stick.